

 Thanks:
  Likes:
  Needs Pictures:
  Picture(s) thanks:
Results 1,651 to 1,665 of 3020
Thread: Your latest project
-
15th Jun 2016, 08:18 AM #1651
 Golden Member


- Join Date
- Apr 2009
- Location
- Ballina N.S.W.
- Posts
- 644

Hi Bob,
Very nice work on an awkward big job, that would have taken many hours to whittle away.
Bob
-
15th Jun 2016, 08:54 AM #1652
 Most Valued Member
- Join Date
- Jul 2006
- Location
- Athelstone, SA 5076
- Posts
- 4,258
great work Bob Originally Posted by bob ward

-
15th Jun 2016, 09:09 AM #1653
.
- Join Date
- Nov 2008
- Location
- Perth WA
- Age
- 71
- Posts
- 6,459
Outstanding work Bob!

Any chance that you photographed some of your setups and if you did, I and I'm sure others would love to see them.
Bob.
-
15th Jun 2016, 09:57 AM #1654
Golden Member
- Join Date
- Jun 2007
- Location
- Vic
- Age
- 48
- Posts
- 544
Wow, I am still learning and this is just too much for me just to think how it was done! Yes photos please
-
15th Jun 2016, 11:19 AM #1655
Most Valued Member
- Join Date
- Jan 2011
- Location
- Far West Wimmera
- Age
- 63
- Posts
- 4,049
Nice wittling. How are your hands and wrists?

Are you going to leave the surface like it is or try to stipple it so it looks more authentic?
Dean
-
15th Jun 2016, 07:49 PM #1656
Philomath in training
- Join Date
- Oct 2011
- Location
- Norwood-ish, Adelaide
- Age
- 59
- Posts
- 6,561
I can well imagine Originally Posted by bob ward
Certainly would, and perhaps some more photos of the two parts as I can't quite visualise all of the shape. Originally Posted by Anorak Bob
Michael
-
15th Jun 2016, 08:05 PM #1657
Diamond Member
- Join Date
- Feb 2013
- Location
- Laidley, SE Qld
- Posts
- 1,039
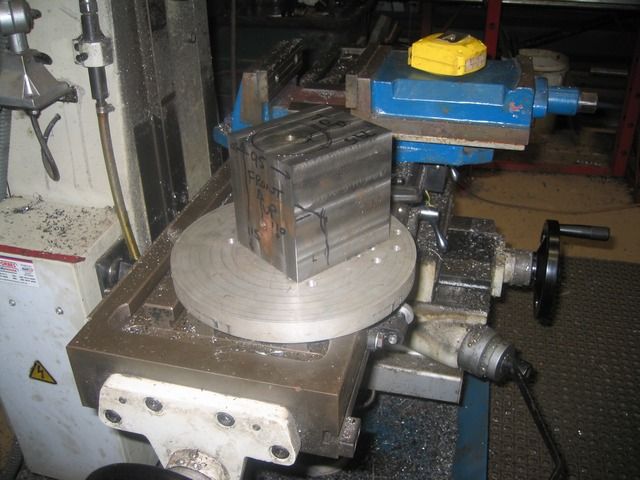
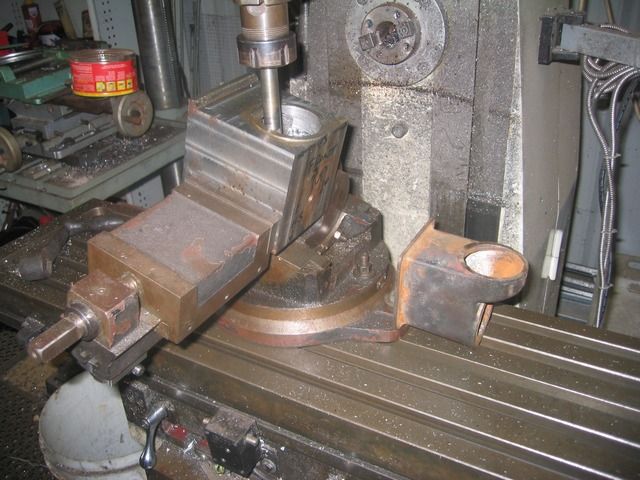
Thanks for the kind words. The job was done using the 3 jaw, 4 jaw and sacrificial faceplate in the lathe, standard vice, tilting vice and rotary table in the mill.
I wasn't 100% sure of the order of operations when I started but I figured I would be safe roughing out the internal cavity. I corner drilled the cavity, removed most of it on the lathe and then milled the rest.
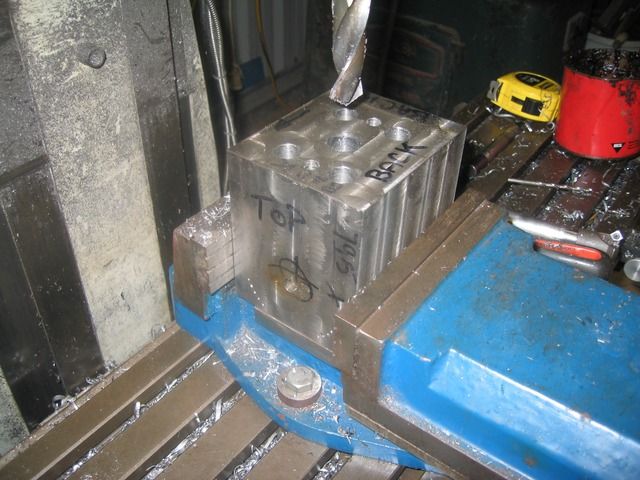
I decided to tackle the top of the casting and the threaded hole for the radiator cap next. This is a photo of contemplating how the job was going to be fitted to the sacrificial face plate.
Before setting up in the lathe for the radiator cap thread I needed to make a 2.25" x 16tpi gauge plug as I don't have a radiator cap to use as a gauge plug. Lacking proper thread wires to do the 3 wire thread measuring thing I used .9mm MIG wire which it turns out is just about spot on for 16tpi.
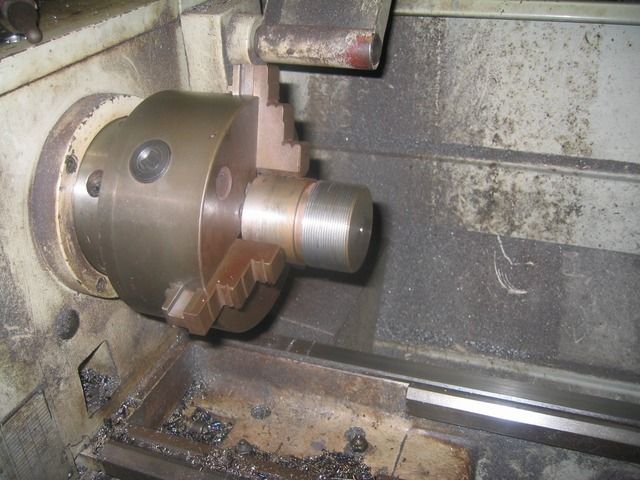
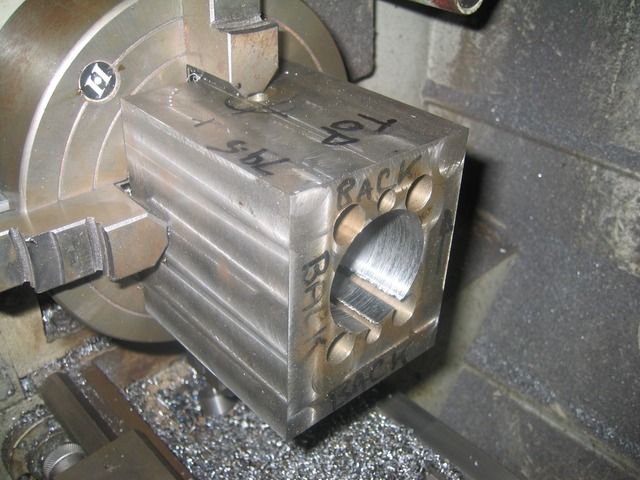
This is 2 shots of the set up to bore and thread the radiator cap hole. Even though everything is well anchored I'm working 100mm from the face of the chuck and had some chatter while threading.
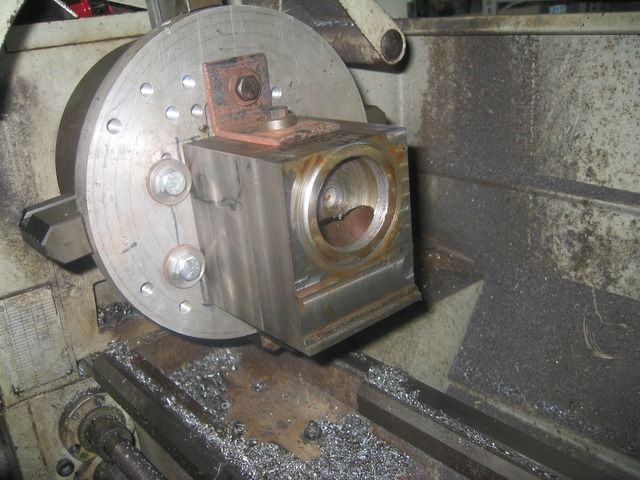
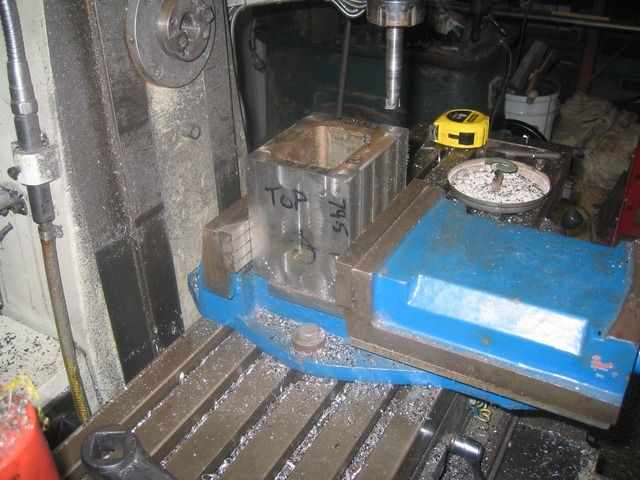
Cleaning up the floor beneath the radiator cap.
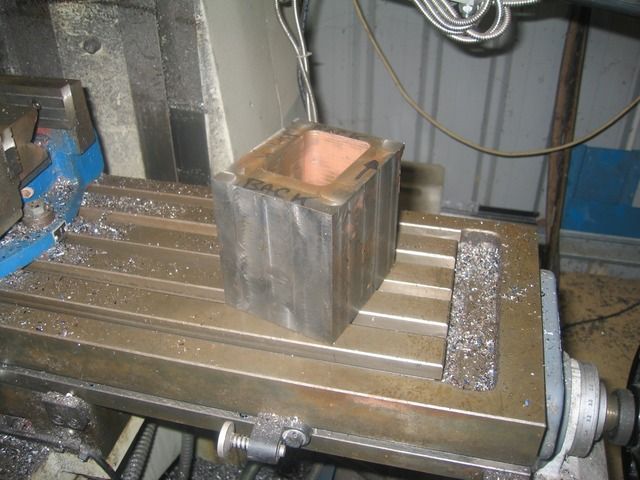
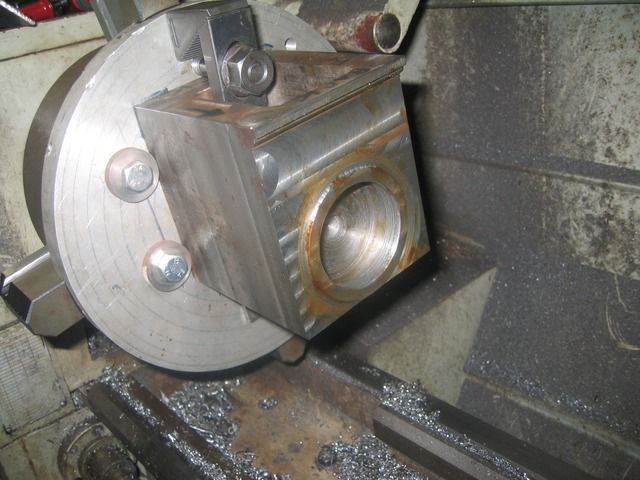
Contemplating the set up needed on the sacrificial face plate to bore the front opening in the casting.
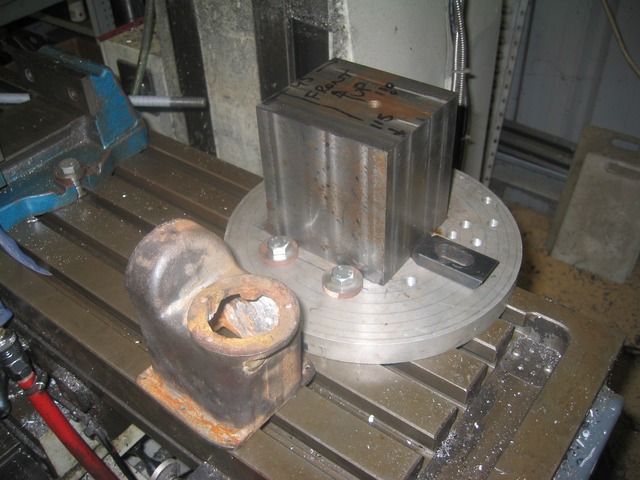
And that's it for photos unfortunately. The 2 curved features were done on the rotary table, after that there was a lot of plain milling to remove unwanted metal.
-
15th Jun 2016, 08:20 PM #1658
Diamond Member
- Join Date
- Sep 2006
- Location
- Mallacoota,VIC,Australia
- Age
- 53
- Posts
- 1,010
Great work
Bob, must have taken hours to whittle the steel away.
All The Best steran50 Stewart
The shortest way to do many things is to do only one thing at once.
-
15th Jun 2016, 09:13 PM #1659
Philomath in training
- Join Date
- Oct 2011
- Location
- Norwood-ish, Adelaide
- Age
- 59
- Posts
- 6,561
Bob, a while ago you posted about cutting fillets on the shaper. Did you end up doing your fillets on there or did you go the ball nose route?
Michael
-
15th Jun 2016, 09:35 PM #1660
Diamond Member
- Join Date
- Feb 2013
- Location
- Laidley, SE Qld
- Posts
- 1,039
I ended up using a ball nose cutter for the fillets. I had spent a bit of time working out how to cut good fillets on the shaper but in the end it was easier and more certain to do the milling and fillets in the one set up on the mill.
-
16th Jun 2016, 09:42 AM #1661
.
- Join Date
- Nov 2008
- Location
- Perth WA
- Age
- 71
- Posts
- 6,459
Thank you for posting the photos Bob. To me the journey is a interesting as the destination.
Viewing the block mounted on the lathe made me yearn a touch for a bigger lathe. My little Hercus would dance across the floor like an out of balance washing machine if I tried to machine that.
Bob.
-
1st Jul 2016, 07:52 PM #1662
Pink 10EE owner
- Join Date
- Aug 2008
- Location
- near Rockhampton
- Posts
- 6,218
Just finished off my contribution to this project. We got it and another identical one a few months ago from an estate and are at least the third owner of it, but the first owner to actually assemble it. Made in 1973 or so according to the dates on the newspapers that the bolts were wrapped up in, so it took awhile to finally get erected. 14ft fan, 35ft tower.
20160701_145639.jpg 20160628_162923.jpg 20160628_072611.jpgGold, the colour of choice for the discerning person.
-
2nd Jul 2016, 01:01 AM #1663
Diamond Member
- Join Date
- Oct 2008
- Location
- N.W.Tasmania
- Posts
- 1,407
Thanks Richard for the post, I love windmills, and have seen quite a few in my outback travels. Amazing to think that you are the first to assemble this mill after more than 40 years since she was built. You may have some difficulty with any warranty claims
 , should you have any issues with it, hopefully there will be none to worry about.
It amazes me when I see one which has been sadly neglected, I remember one still soldiering on with some missing blades on the fan, and lots of missing bracing on the tower, so the whole unit was wobbling around like an old drunk trying to limbo. I wouldn't have thought it would last till smoko, but in reality it had probably been deteriorating slowly for generations, but amazingly was still chugging along.
For the benefit of any other windmill lovers, there is a great display at Toowoomba, the birthplace of countless thousands of windmills. Here is a shot of some of them.
Rob
-
2nd Jul 2016, 02:03 AM #1664
Senior Member
- Join Date
- Jul 2014
- Location
- Alphen aan den Rijn, Netherlands
- Posts
- 208
Hi Richard , nice job. Originally Posted by .RC.
Makes me wonder though, what unattended windmills in your part of the world are used for. I doubt it is to keep your feet dry, like the ones over here.....
Peter
-
2nd Jul 2016, 10:49 AM #1665
Pink 10EE owner
- Join Date
- Aug 2008
- Location
- near Rockhampton
- Posts
- 6,218
We actually needed a warranty claim Rob. In the tower bundle of steel that had not been unbroken since manufacture, it was missing four cross members, that was as far as we got in the photo with the half built tower, as I had to drive 150km one way to get some more. It is a pain when you are working so far from home and your workshop and things go wrong. Originally Posted by Ropetangler
The actual birthplace for the two main windmill companies was actually Rockhampton, both the Griffith family who manufactured the Southern Cross brand and Sidney Williams who manufactured the Comet brand both started operations in Rockhampton, before moving to Toowoomba and Sydney respectively.
Yes, the opposite, keeping our feet wet. Originally Posted by WoodBee2
Here is one we did about ten years ago. Hence the crappy digital photo. This one was put up pre-crane years for us, so everything was done by hand
windmill 014.jpg
Here is how it is done pre crane with a gin pole. and everything gets lifted up in pieces and assembled in-situ.
Generally it is a two day job for proper experienced installers which we are not.
After the tower is built levelled and cemented in the main casting goes up first.
windmill 003.jpg
Then you move the gin pole over and put on the tail
windmill 005.jpg
Then it is lift up the fan pieces, piece by piece and install.Gold, the colour of choice for the discerning person.

 Reply With Quote


Similar Threads
-
latest little project
By wayno60 in forum WELDINGReplies: 3Last Post: 12th Jul 2008, 03:40 PM
