

 Thanks: 0
 Likes: 0
 Needs Pictures: 0
 Picture(s) thanks: 0
Results 1 to 15 of 31
Thread: C.C. tool and cutter grinder
-
16th Oct 2015, 08:38 PM #1
 Intermediate Member


- Join Date
- Jul 2010
- Location
- SE Melbourne Vic
- Age
- 48
- Posts
- 32
 C.C. tool and cutter grinder
Hi Everyone
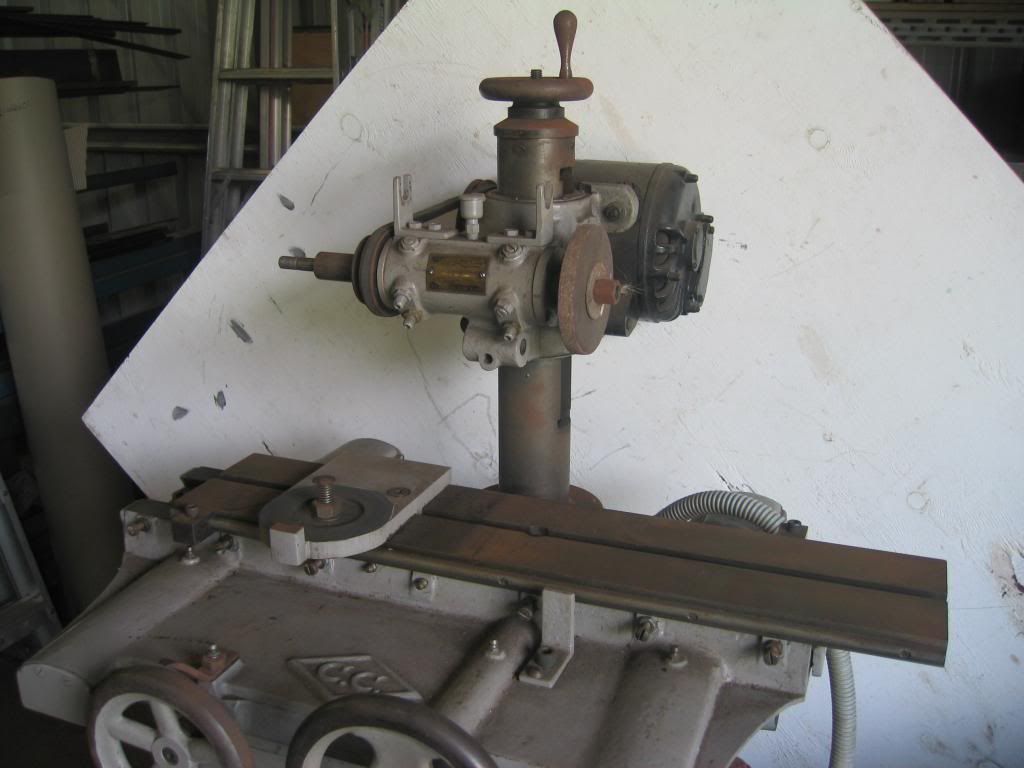
a few weeks back i traveled up to Bendigo to pickup my latest tool.
a C.C. tool and cutter grinder. ebay purchase and not in very good condition as you can tell.
during this trip i had a chance to visit Joe and check his workshop (lots of toys).
i m trying to post photos of the machine as i got it but i have failed to do so using dropbox and photobucket.
any help to get this thread moving would be much appreciated.
-
16th Oct 2015, 09:46 PM #2
Senior Member
- Join Date
- May 2012
- Location
- Melbourne, Victoria
- Posts
- 165
I guess this is it?
http://www.ebay.com.au/itm/Tool-and-...-/151818675727
-
16th Oct 2015, 09:50 PM #3
Intermediate Member
- Join Date
- Jul 2010
- Location
- SE Melbourne Vic
- Age
- 48
- Posts
- 32
yes it is. i have a few photos before and after electrolysis but i cannot post them for some reason.
on the old forum i could but this one does not seem to like urls
-
16th Oct 2015, 10:30 PM #4
Intermediate Member
- Join Date
- Jul 2010
- Location
- SE Melbourne Vic
- Age
- 48
- Posts
- 32
well since i cannot find a solution i will put links up and hopefully that will work.
these are the photos as the grinder was collected


this one is what my small corolla hatch looked like

-
16th Oct 2015, 10:39 PM #5
Intermediate Member
- Join Date
- Jul 2010
- Location
- SE Melbourne Vic
- Age
- 48
- Posts
- 32
as i mentioned i have used electrolysis to remove rust and the results are a lot better than what i expected.
the first part i did was the table as it was really rusty and big and did not want to start removing material with other means
this is what the bath looks like

all it is is washing soda water and a back yard power supply i ve build using an iron core downlights transformer and a 3$ rectifier.
and here are the results 30 hours later


-
16th Oct 2015, 10:47 PM #6
Intermediate Member
- Join Date
- Jul 2010
- Location
- SE Melbourne Vic
- Age
- 48
- Posts
- 32
i have moved on to other pieces and there is left is the stand which is really heavy.
i will not do anything on that as i do not have a big enough bucket for it but i will try and paint it after sanding it down a bit.


-
16th Oct 2015, 10:51 PM #7
Intermediate Member
- Join Date
- Jul 2010
- Location
- SE Melbourne Vic
- Age
- 48
- Posts
- 32
and a few more
the process does miracles even removing paint as you can see.
the black residue does not take more that a rug or a couple of passes with steel wool.
from what i read the process does not touch good steel and from what i witnessed once rust is removed the current dropped and pretty much that is how i knew it was time to take them out.
-
17th Oct 2015, 01:03 AM #8
Most Valued Member
- Join Date
- May 2011
- Location
- Murray Bridge S Aust.
- Age
- 71
- Posts
- 5,959
Nice work, I keep looking out for something like that, but either tooo far away or more than I can afford. Any chance of the details of your power supply, please
Kryn
-
17th Oct 2015, 03:10 PM #9
Most Valued Member
- Join Date
- Jun 2008
- Location
- Victoria, Australia
- Age
- 74
- Posts
- 5,080
Looking good already, it's always good to see a machine brought back from the brink.

Ray
-
17th Oct 2015, 03:34 PM #10
Product designer retired
- Join Date
- Nov 2006
- Location
- Heidelberg, Victoria
- Age
- 79
- Posts
- 2,074
Those hand wheels etc will polish up a treat with something like a sisal mop and green compound.
What colour are you going to paint it?
Well worth recovering.
Ken
-
17th Oct 2015, 10:27 PM #11
Intermediate Member
- Join Date
- Jul 2010
- Location
- SE Melbourne Vic
- Age
- 48
- Posts
- 32
thanks everyone
ok this is a photo of the power supply

as i said it is just a downlights transformer and a jaycar rectifier. very easy and cheap.
http://www.jaycar.com.au/Active-Comp...ifier/p/ZR1320
i did purchase a proper power supply after doing most of the parts and i can say it did not help in any way apart from speeding up things a bit (if i new i would not bother)
i am thinking to paint it with machine grey or something and would like to know if the original CC area was all red or just the two letters if anyone knows.
i am not good with paints and looking to use some enamel epoxy from bunnings
i had a look and they all say no primer required and also although epoxy no hardener.
i did read though online that adding hardener helps with curing time and final hardness.
any input would be much appreciated.
the wheels and other detail items will be treated before final assembly. so far i just cleaned the residue from electrolysis.
-
17th Oct 2015, 11:26 PM #12
Most Valued Member
- Join Date
- May 2011
- Location
- Murray Bridge S Aust.
- Age
- 71
- Posts
- 5,959
Thanks GRF, nice set up.
Kryn
-
19th Oct 2015, 06:49 AM #13
Intermediate Member
- Join Date
- Jul 2010
- Location
- SE Melbourne Vic
- Age
- 48
- Posts
- 32
and some progress
i painted first coat yesterday with gunmetal epoxy enamel.
it is ok but i would do it differently if i was doing it again.
i asked the paints guru and he insisted no primer required. well maybe the paint sticks as advertised but i believe the primer would have smoothed out a bit the rough castings. see what happens after the second coat.
masking the details is what takes a lot of time. i did not know what to do so i put masking tape and then cut the details as i would for gaskets (putting pressure on the edges to force the tape to cut) with the help of an exacto knife.


-
19th Oct 2015, 09:34 AM #14
Most Valued Member
- Join Date
- Dec 2007
- Location
- Melbourne
- Posts
- 1,628
CC Engineering Industries of Glebe, Sydney, NSW, they were well known for their chainsaws which they imported the parts for and made their own sand cast fan housing and petrol tanks bearing the Diamond CC logo. So these may be a rebadged machine also??
They were taken over by Concrete Industries Australia Limited 24/10/1960
The few examples of the logo I have been able to find are monotone. i.e the same color as the machine.
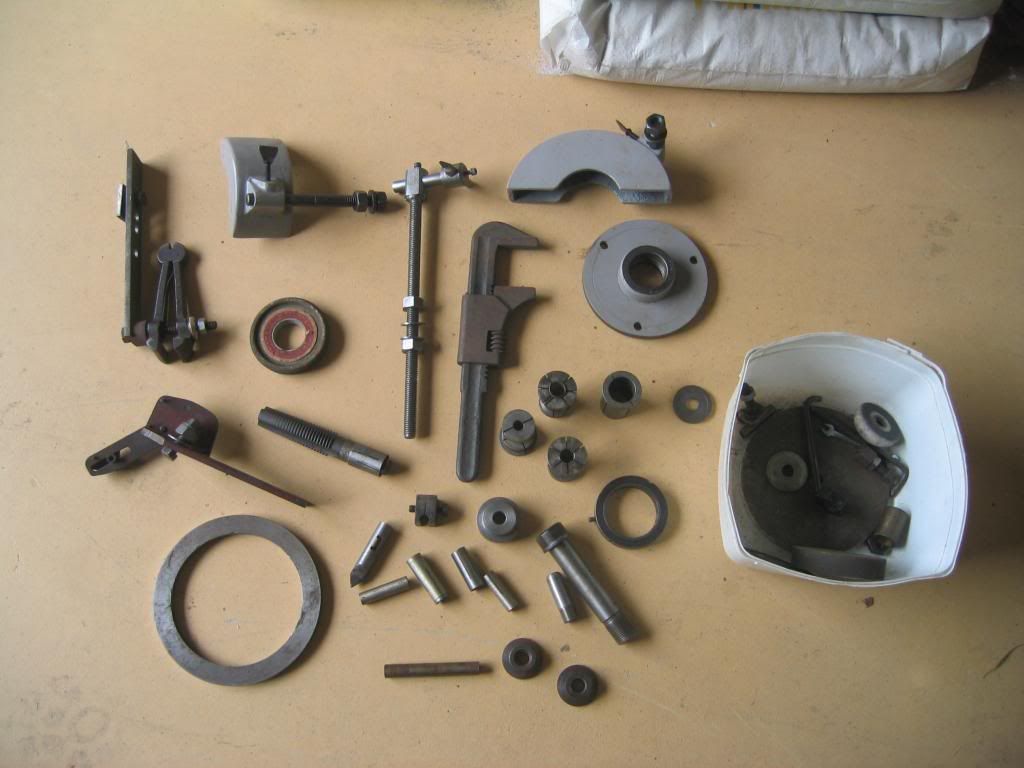
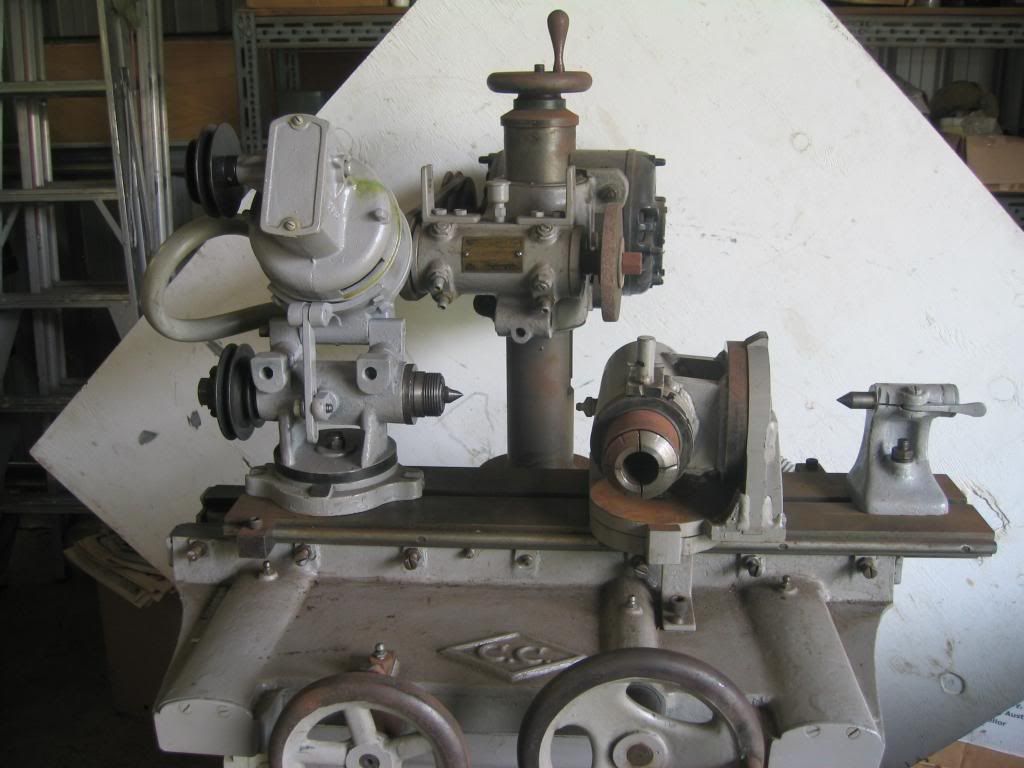
Here are some photos of Bob Wards model D from another site. They might help give you an idea with whats missing even though it's a different model.

Here are a few links:
http://www.woodworkforums.com/showthread.php?t=162839
//metalworkforums.com/threads/1...cutter-grinder..Live a Quiet Life & Work with your Hands
-
19th Oct 2015, 12:08 PM #15
Most Valued Member
- Join Date
- Jul 2010
- Location
- Melbourne
- Posts
- 9,088
Hope yours is in better nick than mine.(its been alleged I took to mine with a mill, but it wasnt me really it wasn't)
Yours seems to have a chromed column, is that right?
Also it seems to have bushes on the spindle.
Cant help with the color sorry, my machine is well I'm not sure what color you would call it lol
Which you would see here if the pictured hadn't disappeared . In fact they have disappeared from the attachment list also.
//metalworkforums.com/threads/1...-amp-C-Grinder
It is grey under its top coat, though I have no idea if its undercoat or the factory top coat, the logo doesnt seem to have a different color to the rest of the machine.
I'll try and dig up my pictures
Stuart
Edit: pictures......http://www.woodworkforums.com/showth...light=murdered
I've done nothing on it since those post other than scrape the two tables. Though I did work out a couple of months back just how I can fix it without making a new table, so who knows I might get back onto it soonish

 Reply With Quote


Similar Threads
-
Another Tool And Cutter Grinder
By Anorak Bob in forum METALWORK GENERALReplies: 26Last Post: 13th Nov 2013, 12:15 PM -
Tool and Cutter Grinder
By Jors in forum METALWORK GENERALReplies: 13Last Post: 17th Oct 2012, 07:32 AM -
Tool and Cutter grinder
By 4-6-4 in forum METALWORK GENERALReplies: 2Last Post: 12th Oct 2011, 11:40 PM -
Tool & Cutter Grinder
By graemet in forum METALWORK GENERALReplies: 14Last Post: 20th Nov 2009, 08:27 AM
